Thursday, January 24, 2013

Madd Tutorial 36

Madd mail came the other day, I received the Holiday in Whoville collection and the VERY limited edition Apocalypse Kit grab bag, which is no longer available.

Here is a look I created using one color from each collection plus another color from an older collection.

First apply a good layer of base and Awesome Sauce

I used these three brushes:
Brow - Pointed Blender - Domed Blender
I use these three brushes all the time

Color 1
Lucky

Take the pointed blender,dip it into Lucky and apply to the inner lid and inner lower lid.

Color 2
Cheermeister

Using the same brush(just wipe it off with a soft clean towel)
Apply Cheermeister to the middle lid. Blend Lucky into Cheermeister using the domed blender until you get a smooth color transition.

Color 3
Cheat Code

Using the cleaned off pointed blender add Cheat Code to the outer lid,crease,and lower outer lid. Grab the domed blender and blend Cheat Code into Cheermeister. I use the brow brush to have better control over blending the crease, and to see what I'm going without the bristles being in my way. Then I use the domed blender to soften up the edges.

Add liner and mascara
I use:
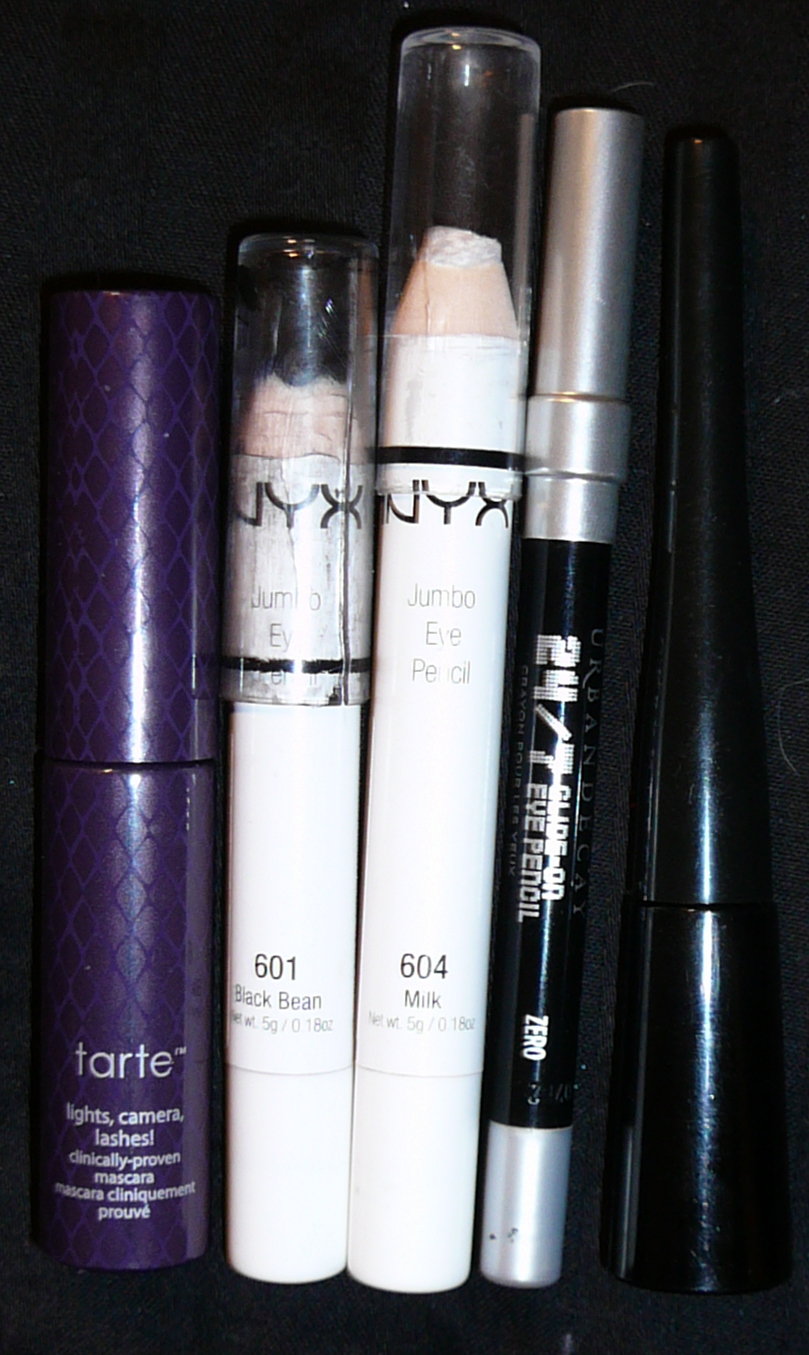
ELF liquid eye liner - Urban Decay 24/7 liner in Perversion - NYX JEP in Black Bean - Tarte Lights Camera Lashes mascara


Saturday, January 19, 2013

Madd Tutorial 35

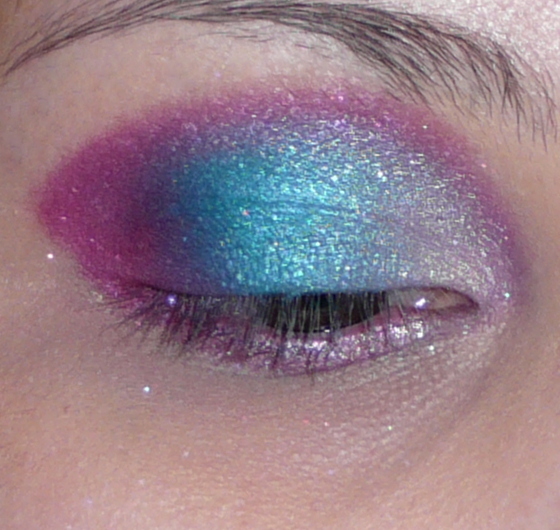
Teal & Pink!!!
Please excuse the messy brows. I'm growing them out for re-shaping...

Ready for the magic?

Lid prep

Pink #1
Seedless

Apply Seedless to the inner lid and inner lower lash line.

Teal
Kozmosis

Add Kozmosis to the middle lid and get ready to use some blendy magic!
Blend Seedless into Kozmosis. This will take a little work since one color is waaaay lighter than the other. Just keep sweeping Seedless over top Kozmosis until there is a smooth color transition, add a little more of which ever color is needed to get the balance right.

Pink #2
Outlaw Star

This is another tuff blend,but it turns out SO pretty!
Slap Outlaw Star on the outer lid, then drag it into the crease all the way to the duct and back along the outer lower lash line. Now blend Outlaw Star over Kozmosis. I played with putting more of each color until I got non blocky blending, then take a crease brush and fade the crease colors together so there is no visible hard line where the colors meet.

I added a thick winged liner and smokey bottom liner to pull this look together


Thursday, January 10, 2013

Madd Tutorial 34

Color request from my dear friend, Brandy!
Snuffy with a POP of color...I wasn't too sure this would turn out so hot,but I was pleasantly surprised.
Enjoy!

Eye prep
Base + Awesome Sauce

SOUL DUST

Apply this gorgeous blue to the inner lid, crease, and inner lower lash line.

ELECTRIC KOOLAID

This amazing purple is going on the center lid area. Blend Soul Dust into Electric Koolaid, adding more EK over where it is blended to make it more purple than blue.

SNUFFY

The yummy, coppery Snuffy is the last color and will go on the outer lid,crease,outer crease, and lower outer lash line. Drag Snuffy all the way to the duct area and blend out so the line isn't harsh. Blend Snuffy into EK adding more EK if needed. Also, blend the lower lash line together.

Liner and mascara
Finished product!


Thursday, January 3, 2013

Madd Tutorial 33 (First of The New Year)

Super excited about my first tutorial of the new year, it is gorgeous!!


Per usual is eye prep. Apply base and awesome sauce!

1st Color
Mune Glow

Mune Glow is going to be applied to the inner lid and inner lower lid.

2nd Color
Hello,Sweetie

Place Hello,Sweetie on the middle lid and up into the crease. Blend Mune Glow into Hello,Sweetie.

3rd Color
Bowties are cool

Bowties are cool needs to go on the outer portion of the lid,along the outer most portion of the lower lash line, and into the crease until it meets Mune Glow. Blend Bowties are cool into Hello,Sweetie at every spot they meet up.

4th Color
Gossip

I applied Gossip to the middle of the lower lash line and the outer area where Hello,Sweetie meets Bowties are cool. Be sure to blend them until smooth.
Use Mune Glow to highlight under the brow area and to soften up the edges.


For my liner I did something a little different. 
Apply winged liner on top lid.
Use a white liner on 1/3 of the inner water line (NYX Milk jep) and a black liner on 2/3 of the water line (UD Zero under NYX Black Bean).
Using a smudge stick smoke out the Black Bean and lightly blend the Milk with Black Bean.


Saturday, December 29, 2012

Madd Tutorial 32

Well sadly this is not the tutorial I wanted to write tonight, buuuuuut it is still awesome!

The tutorial I was going to do involved white and blue, however a good portion of the pictures didn't turn out ,so I am going to have to re-shoot some of them and get that tutorial to you all next week :)

To tide you over here a lovely more neutral look using Frankenberry and The Winchester!


Slap some Base and Awesome Sauce on your lids and let's get this party started!!

First on the lid is going to be Frankenberry

Slather Frankenberry on the first half of the eye lid and on the first half out the lower lash line.

Grab The Winchester

Apply The Winchester to the second half of the eye lid, along the outer lower lash line, into the outer crease, and slightly above the crease.
Blend Frankenberry into The Winchester.
Use Frankenberry as a brow highlight and to soften the edge of The Winchester.


I added winged black liner to the top lid and as smoked out black liner to the bottom to finish off this look, but I think this would look lovely with a brown liner.


Wednesday, December 19, 2012

Madd Tutorial 31

This look was inspired by a character's makeup on a show I was watching last weekend.
I really fell in love with the idea, so I created the same color idea and then added my own touches.

As always I applied some NYX base and Awesome Sauce. 
Keep your Awesome Sauce out after applying it because you are going to need it for the liner portion of this look!

Grab the lovely Desert Punk

Desert Punk is going to be applied to the whole eye lid and lower lash line.

Then with a stiff brush I applied my NYX jumbo eye pencil in Milk as the base for my colorful liner.

It's ok if this looks wonky because it will be covered up. I just used this to give the piggie liner something to grab onto.

Now for the liner color Witch's Brew

Using the back of my hand I applied an almost pea sized drop of Awesome Sauce and an equal amount of Witch's Brew.
Mix the two together using a soft liner brush


Apply mixture over the white guide line you created earlier. Once you  have the Witch's Brew liner the way you like it be sure to set it by patting some dry Witch's Brew over top the still dewy liner.
To finish this look off I added a smokey black liner to the bottom lid and applied mascara


Hope you enjoyed and thank you for stopping by to look!