Saturday, December 15, 2012

Madd Tutorial 30

Seasons Greeting!
It being the holidays and all I figured that a holiday look was in order! 
This one was  inspired by traditional X-Mas colors.

Start off by prepping your lids with a base and Awesome Sauce

The first color used in this Holiday look are

Down The Rabbit Hole

Dab a healthy amount of Down The Rabbit Hole onto the inner lid, in the outer crease and along the inner lower lash line.

The second festive color used is Ruby

You're going to apply Ruby to the middle lid and in the outer crease. Blend Down The Rabbit Hole into Ruby. This will make the color transition a slight pinkish tone.

Last color to join the party is The Bride

The Bride is going to be applied to the outer lid, above the crease, and along the outer lower lashing. Blend The Bride into Ruby. You're going to need a few layers of blending with The Bride.  Use a blending brush to blend out the upper portion of where The Bride ends so that there isn't a harsh line.
Also, I used Down The Rabbit Hole as a brow highlight. This also helps ease the harshness of the line.

Add your favorite mascara and line to complete this look.


Thursday, December 6, 2012

Madd Tutorial 29

Today's look is inspired by my cute nails I painted last night, they're light grey with glittery green polka dots.

As always this look was applied over a white base and awesome sauce.

Starting this look off is 
Are you my Mummy?

Apply a generous amount of Are you my Mummy? to the inner lid, slightly into the middle lid and along inner lower lash line.

Next color Sonic Screwdriver

Take some SonicScrewdriver and apply it to the middle of the lid, blending it into Are you my Mummy?
These two color take a little time to blend nicely. You may need to add more of Are you my Mummy?

Last color ReLove

Apply ReLove to the outer lid,outer crease, above the crease and finally along the outer lower lash line.
Blend ReLove into Sonic Screwdriver until a smooth transition between colors is made.

Add your finishing touches and you're done.

I didn't notice the liner was jacked up until I went to edit these >.< ugh! lol

Wednesday, November 28, 2012

Madd Tutorial 28

I was at a loss for color ideas this evening, so I asked some lady friends what color combos they would like to see. They responded with Honey Badger,Suckerpunch, and a blue. 
So, I put my thinking cap on and came up with this gem!

Start with a naked eye.  
Apply Pop N Lock & Awesome Sauce

(eye with Pop N Lock & Awesome Sauce applied)

The brushes I used to achieve this look are:
Doe footed blender - Domed shadow - Domed blender - Pointed blender

First on the lid is Honey Badger

Using the pointed blending brush I applied Honey Badger to the inner lid letting it flow into the middle lid, slightly above the crease (basically to where I could feel my orbital bone) and the inner lower lid.

Now take Suckerpunch

Using the same brush, but making sure to wipe it off, apply a good amount of Suckerpunch to the middle lid over lapping Honey Badger. Taking the doe footed blending brush, blend Honey Badger over Suckerpunch adding a little more Suckerpunch as you blend.

Next is Space Oddity

Using the domed shadow brush I applied Space Oddity to the outer lid over the end part of Suckerpunch, the outer lower lid, and the outer crease. Use the doe footed blender to blend Suckerpunch into Space Oddity, adding more Space Oddity as needed. Using the domed blender blend the crease so the it fades into Honey Badger. Also, remember to blend the lower lash line colors.

Lastly I took Mune Glow and applied it as a brow highlight using the domed blender.

Final products

Finished look

Saturday, November 24, 2012

Madd Tutorial 27

Felt like yet again playing with some MORE Doctor Who mattes!
Enjoy!


Start out by prepping the eye lid area with Pop N Lock and Awesome Sauce


I started out with Sonic Screwdriver

Put Sonic Screwdriver  on the lid and the inner lower lash line. 
I have no idea why the coloration is so weird. The only thing I could figure was the amount of Awesome Sauce in the area,maybe?

Next Book of Spoilers

Apply Book of Spoilers to the middle lid area.
Blend Sonic Screwdriver into Book of Spoilers.

Last color! The lovely Pandorica.

Pat Pandorica on to the outer lid and along the outer lower lash line
Blend Book of Spoilers into Pandorica.
Also, blend the bottom lash line colors.


Finished look


Saturday, November 17, 2012

Madd Tutorial 26

I cannot begin to tell you how much I LOVE these Doctor Who mattes...seriously, they are brilliant!!

 I think this color combo is gorgeous and I hope you agree ;-)


Start out by making sure you've prepared you eye lid then patting K9 on the inner lid, over into the middle of the lid and along the inner lower lash line


Next pat onto the middle lid area, The girl who waited. Bleeeeeeeeeeeeend K9 into The girl who waited.


Add Bowties are cool to outer lid, outer crease and outer lower lash line. Blend everything until it is smooth with no visible hard lines between colors.

Apply finishing touches


Saturday, November 10, 2012

Madd Tutorial 25

*Waves* Hello!
On this lovely Saturday afternoon I have for you a look featuring some of Mo's "Oops" colors.
Two of the colors I will be using are ones that didn't come out exactly like Mo had planned and the other color is from the Shaun of  The Dead collection that was released as one of this years Halloween collections.

Get your eyes prepped!


Grab your brushes.
For this look I used my lovely Coastal Scents brushes that my lovely friend Vada sent me <3
I LOVE these brushes, btw!
(Smudge - Pencil - Blending)


RECORD TOSS
Using the pencil brush I applied Record Toss to the inner lid, over into the middle of the lid, and along the inner lower lash line

DERP
Again, using the pencil brush I put Derp on the middle lid area. Use a blending brush and blend Record Toss into Derp.

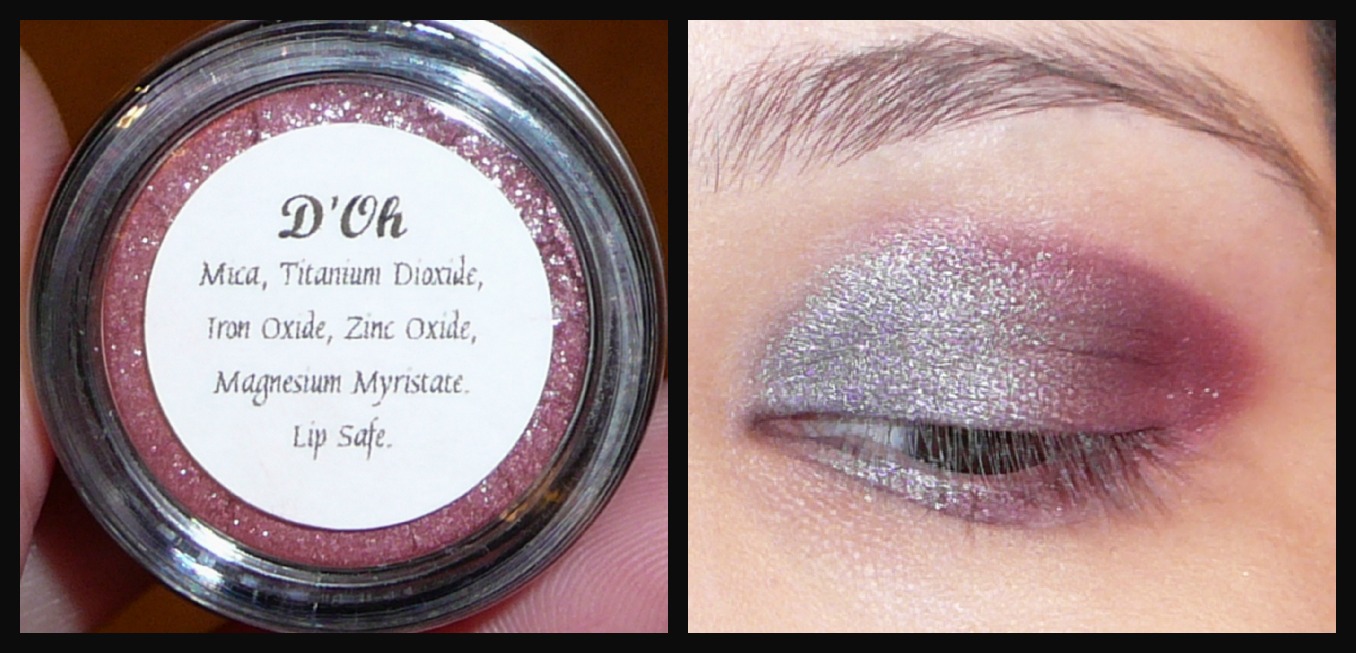
D'OH
Same brush! Apply D'Oh outer lid, blending Derp into D'Oh. Also, apply to the outer lower lash line. 
Take the smudge brush and smudge the bottom lash line colors together.

Finished look